|
Vent Install
You probably don't need a vent if you keep your board below about 90 degrees Fahrenheit. I take my boards out in the morning hours and have them back in the garage before 9 a.m. The worst heat they're exposed to is summer garage temperatures of maybe 100 degrees. No vents, and no problems. You should install some kind of pressure release vent if you expect your board to get hot. If you leave it on the sand, if you put it on top of your car, or in your car on a hot day, or even if you simply have a long walk in the hot sun from the beach to you car / cottage / resort / airstrip or whatever. I installed a Gore vent for the first time recently, and this is how I did it. This should work adequately, and doesn't look too hideous, so take this approach as a starting point, and please improve upon it. What Kind of Vent?
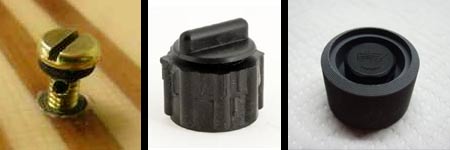
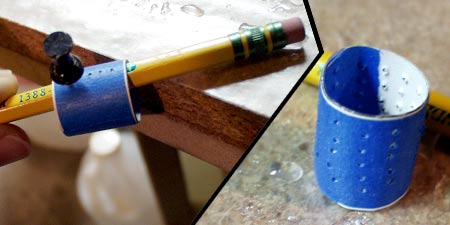
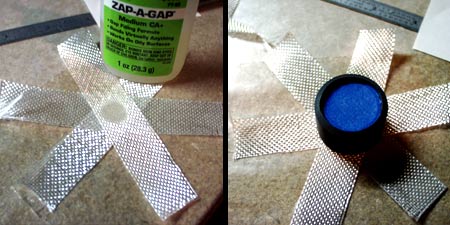
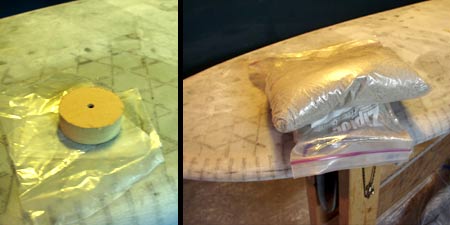
Above you see a DIY hollow brass screw vent by Paul Jensen, a plastic thumb screw manual vent, and a Gore membrane vent. The latter two are available from Foam E-Z and similar vent hardware is available from other board building supply shops. The manual screw vents should be reliable if you can rely on yourself to always remember to open and close them. The Gore vents replace your possibly faulty memory with waterproof breathable Gore membrane technology. Trust the tech or trust yourself. The reviews of the Gore vents seem to be good overall, so I'm trying that first.
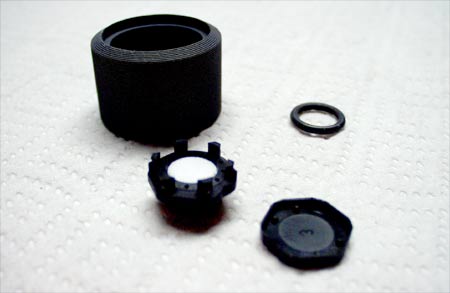
The Gore vent parts: The white round feature in the middle is the gore membrane. That part screws into the black cylinder, with the O-ring to make a water-tight seal. The little hex cap at the bottom snaps over the white membrane. Set aside the the Gore membrane assembly, O-ring and cap. The main project here is to get the black vent cylinder installed in the board.
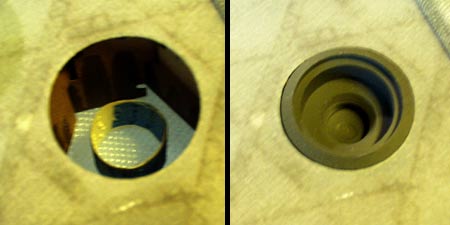
Pick a spot. Cut a hole. Make the hole big enough to allow a layer of glass wrapped around the vent cylinder. Pick a spot near the front of the board. You want the vent to be out of the water most of the time when you first paddle out, so it can draw in air as the board cools. If you pick up a small ding or have a pinhole somewhere in your glass job, less water will leak in if the internal air pressure has been equalized by the vent. A vent in the tail section, that stays mostly submerged, won't have as much of a chance to equalize pressures.
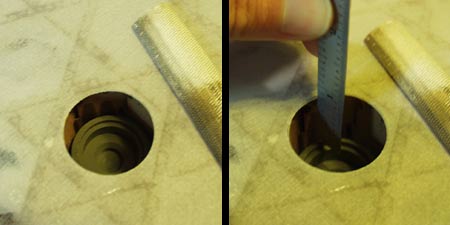
We need to support the vent cylinder from the bottom, to hold it flush with the top while the epoxy sets for the whole mount job. To make a support of the right height, drop the black cylinder in the hole, and then measure from the deck surface to the top rim of the cylinder. Then carefully fish the cylinder back out of the hole, being careful not to mar the threads near the bottom.
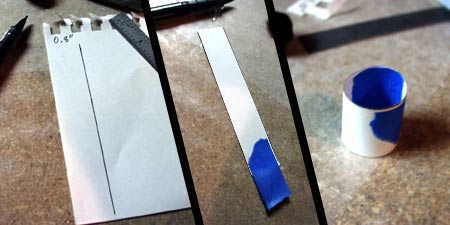
Here we happen to need a 0.8 inch support. So we've made this little cylinder with a 0.8 inch wide piece of paper and a piece of tape.
Later on we'll drill a hole in the bottom center of the vent cylinder, to open it up to the board's inner airspace. That hole will be roughly centered in this paper support cylinder. To make sure the support cylinder is open to air flow, we want lots of holes in it's walls. During the messy wet epoxy steps ahead, some of these holes might get blocked up. So the more the better.
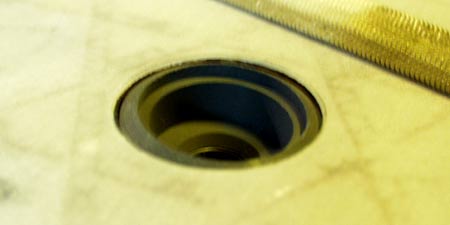
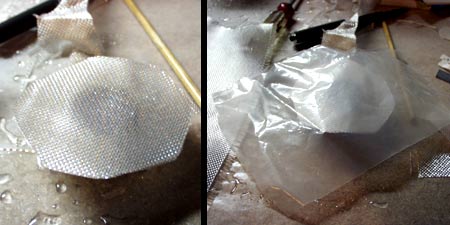
Drop the support cylinder in the hole and the vent cylinder in on top to check the fit. Here the rim sticks up just a bit above the surface. It should be a little lower, so we need to slice a bit off one end of the paper cylinder.
Here's the final dry fit after shaving a bit off of the paper cylinder.
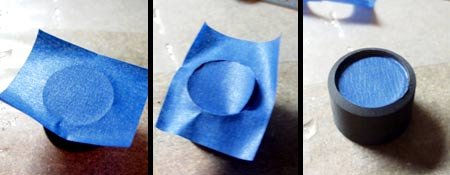
Prep for epoxy work. Cover the inner well of the vent cylinder to keep overflow epoxy and dust out.
With three strips of 4oz. glass, make a star that will fold up around the sides of the vent cylinder, and extend maybe a half inch above the top of the rim. Those extra half inch flaps will fold out flat onto the deck, making a sort of hanging cradle around the vent cylinder. The center of the star is tacked with a bit of superglue. (This work is done on top of wax paper.)
In addition to the glass cradle, we're going to put a couple layers of 4oz. cloth over the vent cylinder - essentially glassing the cylinder completely inside the board. This should allow the epoxy to make a complete seal around the cylinder, especially around the rim near the surface. We also prepare a piece of plastic from a sandwich bag to lay over the wet glass and epoxy later, so we can place weights on top for a flatter flush result. The plastic up against the wet glass will also tend to hold epoxy in the weave, to keep the glass saturated for a better seal.
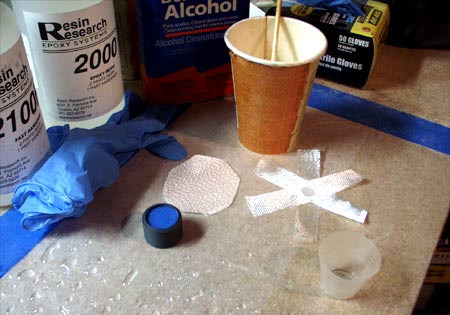
We're now ready to operate. We've got our fiberglass patches - the star cradle and the two round layers that go on top. We've got the workbench covered with a couple layers of wax paper, taped down at the edges. Small measuring cup. Epoxy mixing cup and stir stick. Nitrile gloves. Epoxy. Alcohol for clean up when we're done. Go!
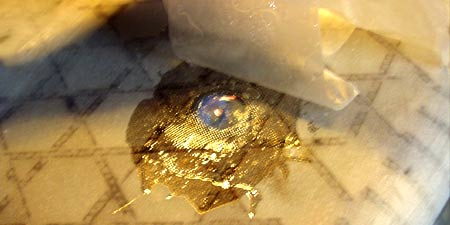
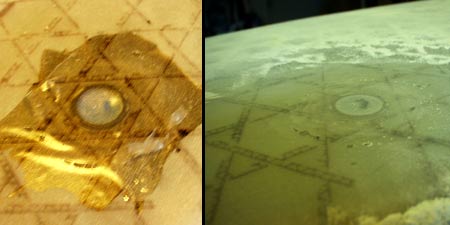
Here's the wet installed vent just before it gets covered with the piece of plastic and weighted down. I've got no pictures of the quick messy epoxy work that led to this. It went like this: Mix up a couple ounces of epoxy. Lay the glass out on the wax paper and pour little lines of epoxy on them and let that start to spread and sink in on it's own. Grab the vent cylinder and smear epoxy all around the sides and bottom. Make sure the glass star is fully saturated. Place the vent cylinder in the center. Fold up the sides of the star (tricky - don't pull the weave apart as you handle it). Take the wet, drippy vent cylinder with glass star wrapped around it over to the board and gently push it into the hole, until it's sitting on the paper support cylinder. Then fold the flaps of the star out flat onto the board surface around the hole. Go back to the workbench for the two round layers of glass. Make sure they're fully saturated. Bring them over to the board and lay them over the vent cylinder. Flatten and spread all the glass, the flaps and the circle patch on top. Everything should be pretty saturated and oozing with epoxy. Push out or fill in any air pockets in the glass. A few bubbles will likely persist around the rim - that's probably okay. Just try to get everything mostly flat and filled with epoxy. (On the other hand, don't get things so wet that epoxy starts pouring into the hexagon cell. Try to keep that leakage minimal.) Finally, lay the plastic sheet on top of the whole mess, so it lays pretty smooth and doesn't have any bubbles under it. Phew.
Put something round and flat on top the plastic, centered on the vent hole. It should be of a greater diameter than the hole, so it's pressing the whole job flat onto the deck surface. Then pile on a bit of weight, like sand in plastic bags.
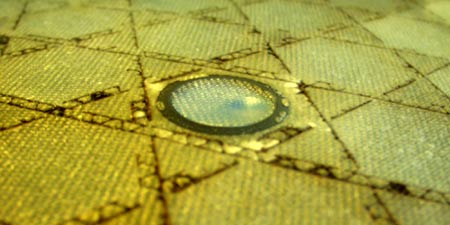
After the epoxy cures, peel off the plastic and sand the whole job smooth, feathering out the edges to blend with the deck, but leaving most of the thickness of the glass over the vent.
You're now ready to do your gloss coat, or whatever else you need to do to finish the board.
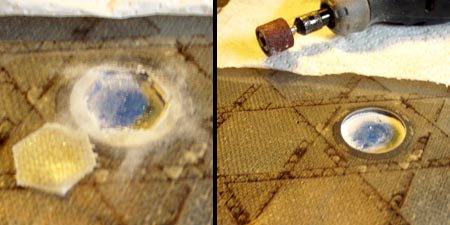
When the gloss job - or whatever surface finishing work you do - is complete, cut out the section covering the vent hole. Carefully sand the edges of the hole in the glass almost up to the inner edge of the vent cylinder rim. Blow out the dust and peel off the tape.
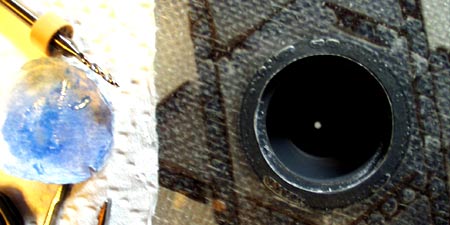
The vent cylinder comes closed on the bottom. You need to drill a hole through the bottom to open it up to the inside of the board. Two things to be careful of here: Don't let the drill bit touch the threaded sides of the chamber, and don't let the drill bit blast through the bottom all the way through and out the bottom of the board. Use something like a nice sharp 1/16 inch drill bit, with tape wrapped around so you don't cut yourself, and drill this out slowly and carefully by hand. Once you get through the plastic, you'll also need to drill through the thin fiberglass cradle that wraps around the bottom. If you think the hole should be wider, it's probably still a good idea to start with this 1/16 inch pilot hole.
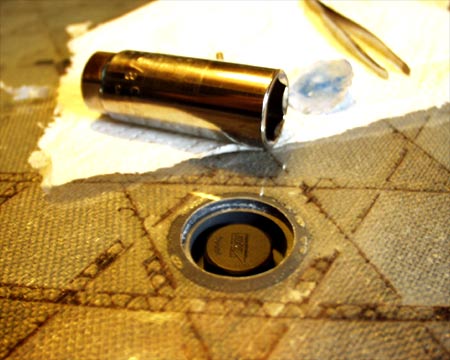
Get the little Gore vent piece, with the O-ring on there, and carefully get the threads started by hand, with a light touch. It would be easy to get these plastic parts cross-threaded, and ruin them. From this point, I'll quote the manufacturer's installation instructions: "The black vent element (plastic bolt) must be very carefully installed as it is easily broken. Only install using a 16mm socket and extension (no handle). Make certain that the socket is fully over the entire head of the element and not just the cap; if not the cap will break off. Tighten to 1/2 ft-lb only, just slightly more than hand tight, just enough to compress the O-ring." ---
There should be a better way to do this whole install, but this worked. One cosmetic drawback is that the paper support cylinder ends up visible on the bottom of the board. It's just a little circle. But because I used blue tape, it's an odd white and blue circle. If you use this approach, make a nicer paper cylinder, with clear tape. Or you might instead make some kind of support that extends from the walls of the hexagon cell, instead of a support that rests on the bottom of the cell. |